 +91 7014607737
 info@technoloader.com
Table of Contents
Key Takeaways:
-
- In 2026, creating a crypto token will become easier than ever, due to advanced blockchain tools and standardized token frameworks like ERC-20, BEP-20, and SPL.
- Ethereum, BNB Chain, and Solana each have their unique advantages. Ethereum for security and ecosystem strength, BNB Chain for low-cost efficiency, and Solana for high-speed scalability.
- A token is a programmable digital asset built on an existing blockchain and is powered by smart contracts to enable payments, governance, staking, and asset representation.
- Proper planning is crucial before development, including defining token utility, selecting the right blockchain, ensuring legal compliance, and securing launch funding.
- The token creation process involves wallet setup, smart contract deployment, contract verification, testnet testing, and secure mainnet launch.
- A successful token launch requires more than deployment: security audits, liquidity setup, DEX listing, marketing, and community building are essential for long-term growth.
In 2026, launching a crypto token is no longer limited to blockchain developers or large crypto startups. With mature tooling, improved smart contract libraries, and scalable blockchain networks, creating a token has become more accessible and efficient than ever before.
Today, many blockchains provide unique benefits such as faster transactions, lower fees, better scalability, or stronger decentralization. Selecting the right network plays a major role in how your token performs, how secure it remains, and how well it grows over time.
Among all available options, Ethereum, BNB Chain, and Solana still dominate due to their active developer ecosystems, reliable infrastructure, and widespread adoption.
In this comprehensive guide, we’ll explore the step-by-step process for creating a token on the ERC-20 (Ethereum), BEP-20 (BNB Chain), and SPL (Solana) standards. From setting up wallets and deploying smart contracts to launching on mainnet and listing on decentralized exchanges, this guide covers everything you need to turn your token concept into reality.
What is a Token?
A token is a digital asset created on top of an existing blockchain, such as Ethereum, BNB Chain, or Solana.
Unlike a coin (such as Bitcoin or Ether), which runs on its own blockchain, a token uses an already established blockchain network. This makes token creation faster, easier, and more cost-effective.
Tokens are powered by smart contracts, which are the self-executing programs that define how the token works, including how it can be transferred, minted, or burned.
Depending on its purpose, a token can:
- Give access to a platform or service
- Represent ownership of an asset
- Allow users to vote in governance decisions
- Be used for payments within an ecosystem
- Represent real-world assets like gold or real estate
In simple words, a token is a programmable digital asset built on an existing blockchain that can represent value, rights, or utility within a project.
Choosing the Right Blockchain: Ethereum vs BNB Chain vs Solana
Once you understand what a token is, the next big step is selecting the blockchain where you’ll launch it. The blockchain you select will directly affect your development process, transaction costs, scalability, user experience, and long-term growth potential.
Before diving into development, let’s review the core differences between these blockchains.
1. Ethereum
Ethereum is the most established smart contract platform and the creator of the ERC-20 token standard. It has the largest developer community and one of the strongest ecosystems in Web3.
Most leading DeFi platforms, NFT projects, DAOs, and institutional-grade tokens are built on Ethereum.
Why Choose Ethereum?
- Strong security and decentralization
- Largest DeFi and token ecosystem
- High trust among investors and exchanges
- Wide compatibility with crypto wallets and platforms
- Extensive developer tools and documentation
Considerations
- Higher transaction fees compared to other chains
- Slower base-layer transactions
Best for: High-value projects, DeFi protocols, governance tokens, and projects seeking strong credibility and long-term ecosystem support.
2. BNB Chain (BSC)
BNB Chain is designed for lower fees and faster transactions. It supports the BEP-20 standard, which works very similarly to Ethereum’s ERC-20.
Because it is EVM-compatible, developers can reuse much of the same Solidity code used on Ethereum.
Why Choose BNB Chain?
- Lower transaction fees
- Faster confirmation times
- Easy migration from Ethereum
- Strong retail user base
- Wide integration with BSC-based DEXs like PancakeSwap
Considerations
- More centralized compared to Ethereum
- Smaller ecosystem compared to Ethereum
Best for: Startups, gaming tokens, low-budget launches, and projects targeting fee-sensitive users.
3. Solana
Solana is a high-performance blockchain designed for speed and scalability. It uses the SPL token standard and follows a different architecture compared to EVM-based networks.
It is known for processing a large number of transactions at very low cost, which makes it ideal for consumer-facing applications.
Why Choose Solana?
- Very fast transaction processing
- Extremely low fees
- Strong ecosystem for gaming, NFTs, and scalable DeFi
- Efficient for high-volume applications
Considerations
- Different development environment (Rust instead of Solidity)
- Smaller developer ecosystem compared to Ethereum
- Past network stability issues
Best for: High-performance applications, gaming ecosystems, NFT platforms, and projects expecting large transaction volumes.
Quick Comparison Table:
| Feature | Ethereum | BNB Chain | Solana |
| Token Standard | ERC-20 | BEP-20 | SPL |
| Development Language | Solidity | Solidity | Rust |
| Fees | Higher | Low | Very Low |
| Ecosystem Size | Largest | Large | Growing |
| Best For | DeFi & Institutional Projects | Cost-Efficient Projects | Scalable Consumer Apps |
Note:
There is no one-size-fits-all blockchain. The right choice depends entirely on your token’s purpose, technical requirements, budget, and long-term vision.
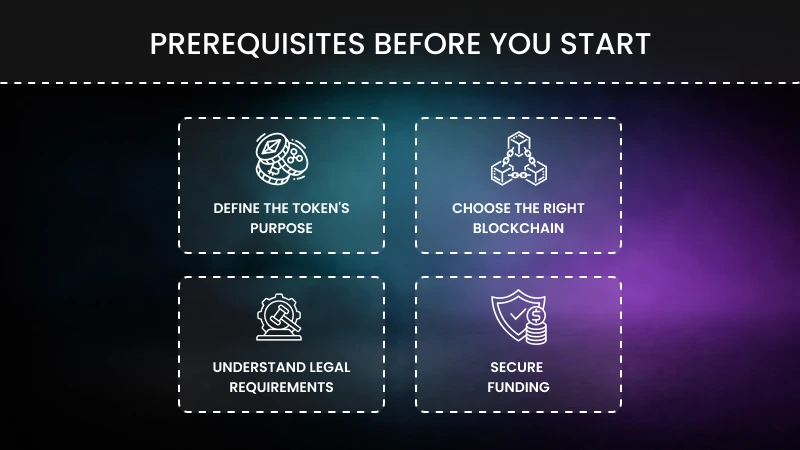
Prerequisites Before You Start
 Before creating a token, here are crucial things you need to be aware of:
- Define the Token’s Purpose:
Before creating a token, clearly define why it exists. Identify the problem it solves and how it will be used within your ecosystem. A token can power payments, governance, staking, or platform access. Without a clear purpose and real utility, your token may struggle to attract users and long-term adoption.
- Choose the Right Blockchain:
Next, select a blockchain that fits your project’s needs. Consider transaction fees, speed, scalability, ecosystem strength, and developer support. Some networks prioritize security, while others might focus on low costs and high performance. Your blockchain choice directly affects user experience, development flexibility, and future growth opportunities.
- Understand Legal Requirements:
Before launching, determine whether your token is a utility token or a security token. Security tokens often require stricter regulatory compliance and legal approvals. Consulting a legal expert helps you avoid regulatory risks, penalties, or future complications, especially if you plan to raise funds or operate globally.
- Secure Funding:
Although token creation can be affordable, a full launch requires funding for development, audits, marketing, liquidity, and exchange listings. Plan how your project will cover these expenses through private investment, pre-sales, or other funding sources. Proper financial planning ensures your project can sustain long-term growth after launch.
Creating a Token on Ethereum (ERC-20 Standard)
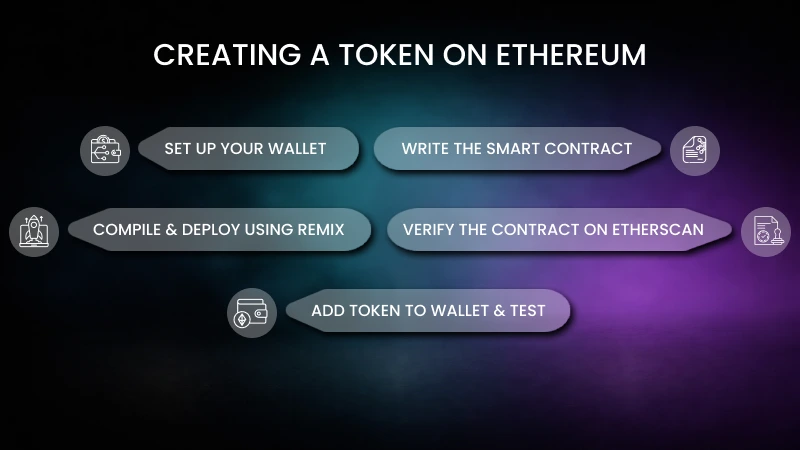
Those who have chosen Ethereum as their blockchain platform are required to follow this step-by-step process accordingly:
Step 1: Set Up Your Wallet:
Install MetaMask – Create a wallet, back up your seed phrase, and connect to the Ethereum testnet – Get free test ETH from a faucet to cover gas fees during testing.
Step 2: Write the Smart Contract:
ERC-20 tokens are simply smart contracts written in Solidity. Here’s the basic structure you will need to follow:
- Name & Symbol: The public name and short ticker
- Total Supply: The number of tokens you want to mint initially.
- Functions: transfer, approve, balanceOf, allowance.
You can also use OpenZeppelin’s ERC-20 template to make this easier and safer, which leads to battle-tested, secure code you can customize.
Step 3: Compile & Deploy Using Remix:
- Open Remix IDE
- Paste your ERC-20 contract code.
- Compile it using the Solidity compiler.
- Under “Deploy & Run,” choose “Injected Web3” to connect to MetaMask.
- Deploy the contract; herein, MetaMask will ask you to approve the transaction.
Step 4: Verify the Contract on Etherscan:
Once deployed, you will get a contract address. Go to Etherscan and search for your contract address. Once you find it, use verify & publish to upload your source code. This makes your contract transparent and easier for others to trust.
Step 5: Add Token to Wallet & Test:
In this step, you need to open MetaMask and import tokens. Paste your token’s contract address to see it in your crypto wallet, and lastly, test it by sending a small amount to another wallet. Consider checking whether the transfer is working as expected.
Lastly, you can have a fully functional ERC-20 token running on the Ethereum testnet. Once you’re confident it works, repeat this process on the Ethereum mainnet by using the real ETH.
Creating a Token on BSC (BEP-20 Standard)
Now, moving on to the Binance Smart Chain, it is one of the most popular blockchains for creating tokens due to its fast, low-cost, and Ethereum-compatible nature. Typically, tokens on BSC follow the BEP-20 standard, which works similarly to Ethereum’s ERC-20 standard. The process is the same, but let’s have a look:
Step 1: Set Up MetaMask for BSC:
To begin with your token, first, you are required to install MetaMask. If you’ve already set it up, then proceed to the next step. MetaMask is usually connected to Ethereum, so you’ll need to add the BSC network manually. For this, you will need to fill in the network name, RPC URL, Chain ID, symbol, and block explorer, and switch your wallet to the BSC network.
Step 2: Write Your BEP-20 Smart Contract:
Next, write your BEP-20 smart contract. It is almost identical to ERC-20, so you can often use the same Solidity code. Define:
- Token name
- Symbol
- Total supply
- Decimals
Use OpenZeppelin’s BEP-20 template to make it secure and error-free.
Step 3: Compile & Deploy on Remix:
- Open Remix IDE.
- Paste your BEP-20 contract code.
- Compile the contract.
- Connect Remix to MetaMask and choose “injected Web3.”
- Click Deploy – MetaMask will pop up – Confirm the transaction.
Step 4: Verify Contract on BscScan:
After you’re done with compiling & deploying on Remix, next you’re required to verify the contract on BscScan. Once deployed, copy your contract address, go to BscScan, and use verify and publish to upload your source code. This step makes your token contract transparent and trusted by users.
Step 5: Add Token to MetaMask & Test:
In MetaMask, click Import Token and paste your contract address. Your token balance will appear in MetaMask. Try sending a small amount of tokens to another wallet to verify that transfers work correctly.
Lastly, you can now have a thoroughly working BEP-20 token deployed on Binance Smart Chain. It will be compatible with all BSC dApps, PancakeSwap, and most crypto wallets.
Creating a Token on Solana (SPL Token)
If you’re planning to build your token on Solana, then you will gain the advantage of fast, cheap, and perfect DeFi, gaming, and NFT-related ecosystems.
Step 1: Set Up Your Solana Environment:
- Install Rust: Solana tools rely on Rust.
curl –proto ‘=https’ –tlsv1.2 -sSf https://sh.rustup.rs | sh
- Install Solana CLI – Official tool to interact with the Solana blockchain.
sh -c “$(curl -sSfL https://release.solana.com/stable/install)”
- Install SPL Token CLI – Needed for token creation and management.
cargo install spl-token-cli
Step 2: Create a Solana Wallet:
- To generate a new wallet, use the Solana CLI.
solana-keygen new –outfile ~/my-wallet.json
- Set it as your default wallet:
solana config set –keypair ~/my-wallet.json
Step 3: Fund Your Wallet:
A small amount of SOL is needed for network fees.
- On devnet:
solana airdrop 2
- On mainnet, purchase SOL from an exchange and transfer it.
Step 4: Create the Token:
Run the following command to create your SPL token:
spl-token create-token
You’ll get a token address, which is your token’s unique identifier.
Step 5: Create a Token Account (Wallet for the Token):
To hold your new token, create an associated account:
spl-token create-account <TOKEN_ADDRESS>
Step 6: Mint Tokens:
Mint a supply of your token in your account:
spl-token mint <TOKEN_ADDRESS> <AMOUNT> <ACCOUNT_ADDRESS>
Step 7: Set Token Metadata:
To add the name, symbol, logo, and decimals, you will require the Metaplex Token Metadata program.
However, you must know that metadata JSON contains details about your token.
Step 8: Verify & Use Your Token:
- Check token details:
spl-token accounts
spl-token supply <TOKEN_ADDRESS>
- Now your SPL token can be
- Added to Solana wallets
- Listed on Solana DEXes
- Integrated into dApps or DeFi protocols.
It might sound complicated, but all you need to do is install Solana tools. Create a wallet, fund it, and create a token: set up a token account, mint supply, set metadata, and then deploy and use.
Testing & Auditing Your Token
Testing and auditing are absolutely critical before you launch your token to the mainnet. So, here are the key things you need to keep in mind:
Importance of Testnet First:
Before it goes, always deploy your token on a testnet. This lets you check supply, transfers, burn/mint functions, and integration without risking real money.
Smart Contract Security Audits:
Even with no-code tools, your token runs on a smart contract. Professional auditors manually review smart contracts, and automated scanners such as MythX, Slither, and Certora help identify vulnerabilities.
Other common vulnerabilities to avoid:
- Reentrancy attack
- Integer overflow/underflow
- Unprotected admin functions.
Deploying to Mainnet
While examining your token on testnet, if your token works perfectly, then you can launch it for real:
- Switching Networks: In MetaMask/Phantom, change from testnet to the mainnet.
- Funding Your Wallet: Deposit real ETH, BNB, or SOL to your wallet, which is enough to cover gas fees for contract deployment.
- Final Deployment & Verification: Use your chosen no-code tool to deploy on mainnet. And after the deployment:
- Save the contract address.
- Verify the contract on Etherscan/BscScan or publish metadata on Solana Explorer.
- Add the token manually to your wallet for easy access.
Listing & Marketing Your Token
Creating a crypto token is just a one-step process; getting people to use it is the real task.
Listing on DEXs:
- For Ethereum – Uniswap
- For BSC – PancakeSwap
- For Solana – Raydium
You’ll be required to create a liquidity pool by simply pairing your token with ETH/BNB/SOL or with a stablecoin like USDT/USDC.
Community Building:
A successful token depends on trust and community engagement. Build your community on platforms like X, Telegram, or Discord. Share all the potential updates, use giveaways, and create a clear roadmap.
Cost Breakdown
Lastly, if we talk about the cost of creating a token, this majorly depends on the blockchain:
1. Ethereum:
- Token creation (no-code): Typically affordable when using standard templates.
- Gas fees: Deployment costs vary based on network congestion and can be higher compared to other chains.
- Pros: Highest security, largest ecosystem, strong investor trust.
- Cons: Higher transaction fees, especially during peak usage.
Ethereum is ideal for high-value projects that prioritize security and ecosystem strength over low fees.
2. BSC (BNB Chain):
- Token creation: Generally affordable and EVM-compatible.
- Gas fees: Lower and more predictable than Ethereum.
- Pros: Cost-efficient, fast transactions, strong retail user base.
- Cons: More centralized compared to Ethereum.
BNB Chain is suitable for startups and projects targeting low-cost launches.
3. Solana:
- Token creation: Typically inexpensive using SPL tools.
- Transaction Fees: Extremely low compared to most networks.
- Pro: High-speed performance, low cost, ideal for high-volume applications.
- Cons: Smaller developer ecosystem compared to Ethereum; different development environment.
Solana is well-suited for gaming, NFT, and consumer-focused applications.
Important Note:
Although deploying a basic token can be affordable, a complete token launch also involves smart contract development, security audits, legal consultation, marketing, community building, and initial liquidity. The total cost varies depending on your overall project goals, not just the initial deployment fee.
Conclusion
To conclude, creating a token on blockchain like Ethereum, BNB Chain, or Solana is now more accessible than ever, but launching it successfully requires careful planning.
From defining your token’s purpose and choosing the right blockchain to testing, auditing, and listing on exchanges, every step plays an important role in your project’s long-term success.
The right network depends on your goals, budget, and technical needs. While the process may seem technical, a structured approach makes it manageable and efficient. In contrast, if you want expert guidance, security-focused development, and end-to-end support, Technoloader is here to help you build your token and launch your token smoothly and confidently.
Ready to launch your token the right way? Let’s connect and turn your Web3 vision into reality today!
Frequently Asked Questions
-
What sets ERC-20, BEP-20, and SPL tokens apart?
Ethereum uses ERC-20 tokens, BNB Chain uses BEP-20 tokens, and Solana uses SPL tokens. ERC-20 and BEP-20 are similar because they both use Solidity and work with the EVM. SPL tokens, on the other hand, follow Solana’s own architecture.
-
What is the cost of making a token on Ethereum, BNB Chain, or Solana?
The price varies depending on the blockchain and gas fees. Ethereum usually costs more to deploy than BNB Chain and Solana, which are cheaper. Smart contract audits, liquidity setup, and marketing are among the other costs that might come up.
-
Do I need coding skills to create a crypto token?
You can make basic tokens without writing any code. But if you want advanced features, better security, and long-term scalability, you should learn about smart contracts or work with professional developers.
-
How do I list my token on a decentralized exchange?
You need to make a liquidity pool by pairing your token with a base asset like ETH, BNB, SOL, or a stablecoin in order to list it on platforms like Uniswap, PancakeSwap, or Raydium. Trading is possible once liquidity is added.
-
Do I need to check my token before I launch it?
Yes. Even a simple token can run on a smart contract, which may contain vulnerabilities. A security audit helps detect potential risks and protects users from exploits before launching on the mainnet.
Kanak Badaya
I’m Kanak Badaya, a technical content writer with 2+ years of experience. I like turning complex technology topics into simple, reader-friendly content that's easy to understand and practical to use.
Published in Token Development


